Showing posts with label Recipe. Show all posts

Friday, December 21, 2012

Chewy Molasses Spice Cookies

We had a cookie exchange at our homeschool co-op. I was really excited to see what kind of cookies everyone would make. These kinds of things make me really excited. It's the type of person Moni is. The day that I baked, I kept repeating that I had to make three dozen cookies. I know myself too well to not do that. I had A2 count and recount the cookies. There were a little over three dozen cookies.

When my husband came home, I looked him in the eyes and told him not to eat the cookies because I had to take them to the cookie exchange. I didn't want to take any chances. I could picture myself going to the bathroom and coming back to six less cookies. I fed him a cookie and told him not to touch anymore because I needed to take three dozen cookies.

My children had so much fun scooping out the dough. (Side note: if you make cookies, you need a small ice cream scooper! I learned that very late in my cookie making.) They couldn't wait to taste the cookies! My house smelled so good as we waited! When they were done, we each tried one. All my kids gave their thumbs up for the recipe.

The next day I went to the co-op with my three dozen cookies. I took my cookies to the area that everyone else had set up their cookie trays. I started talking to another mom and then learned... that I was supposed to make four dozen cookies! They had even sent an email. This is my life. This is me. I pulled a moni! All that counting. All that repeating. This is why I need a personal assistant.

I had also forgotten that I was supposed to bake cookies for A1's science class. A double moni! So what did I do? I went to a local grocery store and bought some cookies from the bakery section. They were freshly baked, but not by me!

This was the first time that I had used this recipe. I really like the taste of molasses, but I wasn't sure how the kids would react. In the end, we all really liked this cookie recipe. The cookie is chewy and the sugar coating gives it a little crunch.


Chewy Molasses-Spice Cookies
adapted from marthastewart.com

Ingredients

2 cups all-purpose flour
1 1/2 teaspoons baking soda
1 1/2 teaspoons cinnamon
1/2 teaspoon ground nutmeg
1/2 teaspoon salt
1 1/2 cups sugar
3/4 cup (1 1/2 sticks) unsalted butter, softened
1 large egg
1/4 cup molasses

Directions

1.   Preheat oven to 350 degrees.
2.   Whisk flour, baking soda, cinnamon, nutmeg, and salt in medium sized bowl.


3.   Set aside 1/2 cup of sugar in a small bowl.
4.   With a mixer (stand or handheld), beat butter and remaining 1 cup of sugar until combined.
5.   Beat in egg and then molasses. Mixing well after each one.


6.   Put one third of the dry ingredients into the mixer.


7.   Mix.
8.   Do the same with the next third, and then the last third.
9.   Mix until well combined.
10. Place in refrigerator for 10-15 minutes (to make it easier to handle).
11. Use a small ice cream scooper (approximately 1 tablespoon of dough) to scoop into reserved sugar.
12. Roll balls in sugar.


13. Optional (what I like to do): Cut parchment paper to fit baking sheets. This makes it easier to clean and reuse the pans.
14. Arrange balls on baking sheet. Three inches apart.


15. Bake one sheet at a time, until edges are firm. (10-15 minutes)
16. After taking out of oven, cool on the baking sheets for one minute.


17. Transfer to cookie rack (another must if you are going to bake cookies) to cool.
18. Store in airtight container.


Wednesday, October 31, 2012

Vegan Black Bean Brownies, That's Right!

When I came across this recipe, I gasped. How could it be possible? How was it that no flour was used? How could I get my kids to eat it? So many questions... all I had to do was make it and get some people to taste test for me.

I apologize for no pictures, but it was dark, chocolate-fudge-brownie-like. And it was very good.

I pulled this recipe out, and A3 saw it. He said, "Yum Mom, can you make more?"

Hope to make these some time this week! Will try and take pictures and post them later.


Vegan Black Bean Brownies
adapted from mealmakeovermoms.com

1 can black beans (rinsed and drained)
1/3 very ripe banana
6 tablespoons of unsweetened applesauce
2 teaspoons vanilla extract
1/2 cup sugar
1/2 cup unsweetened cocoa powder
1/8 teaspoon salt
1/2 teaspoon baking powder

optional:
1 tablespoon instant coffee
1/2 cup semi sweet chocolate chips

3 eggs instead of 6 tablespoons applesauce (for a non-Vegan version)


1. Preheat oven to 350 degrees.
2. Place beans in food processor and mix until smooth.
3. Add bananas and applesauce and blend.
4. Add vanilla extract, sugar, cocoa powder, salt, and baking powder.
5. Blend together.
6. **You can also add half of your chocolate chips and blend.
7. Line brownie pan with parchment paper for easy pan removal.
8. Pour batter into pan (can place remaining chocolate chips on top).
9. Bake for 20 minute intervals, checking to see if a toothpick comes out clean.
10. It took me over 1 1/2 hours to bake because of the applesauce. If you use eggs, it can take 35    minutes.


Friday, October 19, 2012

Spicy Kale Chips


I know, when I first heard about kale chips, I wasn't too eager either. Then, I kept reading about how good they were in a lot of blogs. So, I had to try them. I added a bunch of different spices to match my taste, and in the end, they were really good! The crispiness made them quite addictive, I must say. A very good alternative to potato chips but super healthy!

I made these in June and kept forgetting to put the recipe on the blog. Oops! Try these! They are so good! I would recommend that you eat them the day that you make them. The second day, they get a bit soggy. Still good, but crispy is better! Also, I used two bunches of kale instead of one. I was a bit ambitious that day!


Spicy Kale Chips

1 bunch of kale
4 tablespoons extra virgin olive oil
1 tablespoon agave
1/8 teaspoon salt
1/8 teaspoon pepper
1/8 teaspoon garlic powder                  **Please feel free to adjust spices to your taste!**
1/8 teaspoon curry powder
1/8 teaspoon tumeric
1/8 teaspoon cayenne pepper


1.   Preheat oven to 375 degrees.
2.   Rinse and drain kale.
3.   Remove leaves from inner stem.


4.   Cut into small, bite size pieces.


5.   Place in a large bowl.
6.   Place the EVOO, agave, salt, pepper, garlic powder, curry, turmeric, and cayenne pepper, in a     bowl.
7.   Mix with a whisk.
8.   Pour over kale and mix with hands.


9.   Place kale on baking sheet.


10. Bake for 15 minutes. Keep checking at 10 minute intervals after this.
11. Move the kale around so that the wetter pieces get baked.


12. Your goal at this point is to get all the kale crispy.


**You have to be vigilant about checking the kale. It burns easily.
**You can take out the pieces that have crisped and leave the soggy ones to continue to dry out in the oven.


Monday, October 1, 2012

Carrot, Apple, Green Shake


This was my dinner a few nights ago. You would be surprised at how full you get from drinking a green shake. During the day, I ate something that wasn't so healthy so I needed to balance things out. It is easier and less time consuming to drink my veggies vs. eating them. You would be really surprised at how full you get from one of these shakes. I get the food, nutrients, and energy, to get me going until the next meal. Wouldn't think it, but it's true.


As you know, I really enjoy watching documentaries. Lately, it has been documentaries about food. I really encourage people to watch these types of documentaries. Awareness... it is really enlightening. Like I have said many times before, don't wait until you are sick. Here are some of the food documentaries I saw on Netflix:

Food, Inc.
Food Matters
Fat, Sick & Nearly Dead
Deconstructing Supper
Supersize Me (I think this was the title)


Carrot, Apple, Green Shake

1 apple (with peel, no core)
1 banana
2 carrots
2 purple cabbage leaves
2 tablespoons raw sesame seeds
3 tablespoons raw sunflower seeds
1-2 cups ricemilk
1 cup coconut water

1. Cut hard vegetables and fruits.
2. Put in blender.
3. Mix.
4. Expect to be full.


Wednesday, September 26, 2012

Rotisserie Chicken and Hummus Sandwiches


My friend's daughter was eating this on an ice skating play date. It looked really good, and she told me that it was really good. Couldn't stop thinking about it. I was curious to see how the chicken, hummus, and radish would come together. So, I grabbed a rotisserie chicken and the other ingredients and made it for my family. And it was really, really good!

A3 happened to come by as I was typing this post. He saw the picture of the sandwich and commented, "Mom, that was really good." My kids loved this sandwich. We didn't put as many radish slices on their sandwiches, but they still ate everything up.


Rotisserie Chicken and Hummus Sandwich
adapted from Barefoot Contessa


Ingredients

1/2 rotisserie chicken (deboned, shredded the night before)
1/4 cup minced celery
2 tablespoons onion
2 tablespoons freshly squeezed lemon juice
2 tablespoons mayonnaise
1 teaspoon Dijon mustard
1/2 teaspoon sea salt
1/4 teaspoon freshly ground black pepper

Sourdough bread, sliced
Hummus (store bought or homemade)
Fresh radishes (thinly sliced)


Directions

1. Place chicken, celery, onion, lemon juice, mayo, mustard, salt, and ground pepper in a bowl. Mix together.
2. Refrigerate for a few hours to let the flavors soak in. Or, just eat.
3. Toast bread.
4. Spread a generous amount of hummus.
5. Layer radish slices over hummus.
6. Spread chicken salad on bread.
7. Serve.


Thursday, September 20, 2012

Watermelon Juice


Some things are so simple that we often overlook them. This is one of those things. I had some cut up watermelon, and I wanted to make a snack for my kids. I put everything in the blender and served it to my children. It was so refreshingly good! My kids wanted more and more, but I had to save some for my hubby. Naturally sweet, no sugar, freshly made, and no added anything. What else can you ask for?

I also had a variation of this when I went to my friend Judi's house. She packed the blender with watermelon, ice, and a slice of lime. She blended everything and gave me a glass! It was so refreshing! I never would have thought of that combination, but it was a winner! Try it for yourself!


Friday, September 7, 2012

Homemade Chocolate Almond Energy Bars

There are times (like breakfast) when I force myself to eat because:
  1. I need energy for the rest of the morning.
  2. I need to eat my vitamins and I can't on an empty stomach.
  3. It is the healthy thing to do.
  4. It gets my system going.
There are also other times in the day when I need an energy boost but I don't have time to eat. I might be driving my kids to an activity or in between errands. A mom's job is never done. This is when I need something that I can eat quickly but is healthy for me. I came across this recipe and I had to try it.

All the energy bar recipes I came across had dates as the "binder." I like dates but I wasn't sure how it would taste. I wondered if the taste of the dates would overpower the recipe. I was surprised to find that that wasn't the case. The dates add a sweetness that is balanced by the almonds and almond butter. 

I do recommend that when you measure the dates, you press them down in the measuring cup. This will ensure that the bars have enough "binder" to keep them from falling apart. If they do seem to be falling apart, add more dates or almond butter.

When I made this recipe, I made half a batch because I wanted to make sure that I liked the taste. I did like the taste, but I did make the mistake of not adding enough dates (didn't press them down into the measuring cup). Add enough dates and make sure that they are pitted! Just wrap these bars in parchment paper/plastic wrap and keep them in the refrigerator. Grab one when you are going to be out and about and in need of some energy.


Homemade Energy Bars
adapted from foodiewithfamily.com

4 cups whole, pitted dates
2 cups raw almonds
1 cup dark chocolate
2 tablespoons almond butter

1. Line a 9" x 13" pan with a piece of parchment paper.
2. Add almonds to a food processor and pulse until they are uniformly chopped.


3. Chop chocolate bar into smaller pieces.
4. Add the chocolate into the food processor and pulse again until the chocolate is finely chopped.
5. Pour mixture of almonds and chocolate into a bowl and set aside.
6. Add half the dates into the food processor until a paste forms and clumps together.


7. Add 1 tablespoon of almond butter and half of the almond/chocolate mixture into the food processor.


8. Process until combined.
9. Place mixture into prepared pan.
10. Repeat with remaining almond/chocolate mixture and almond butter.


11. When all the ingredients have been processed, use the bottom of a measuring cup to press the         mixture down into the pan. Make sure to press down firmly until the top is even and smooth.


12. Refrigerate for at least 2 hours.
13. Slice and serve.


14. Store in an air-tight container and place in the refrigerator.


I have one of those mini food processor attachments, so halving the mixture in the food processor worked for me. If you have a large food processor, I think that it might be okay to place the whole mixture in. You know your food processor better.

I ate mine with my green drink. Felt really healthy. The mixture of almonds, dates (for sweetness), and dark chocolate, blended well together. I also liked that this bar wasn't overly sweet. I am becoming my mother...


Wednesday, September 5, 2012

Watermelon Sorbet


A while back, I had asked my husband for an ice cream maker so that I could make some non-dairy ice cream. Ice cream has always been a part of my life: winter, spring, summer, or fall. It made sense to me that we should have one, but it didn't make sense to him. He said that we had no room in our home and that we didn't need one. Unfortunately, he wouldn't budge.

And then, one day this past summer, an ice cream maker fell on my lap, and I had nothing to do with it! Really! Really! Since it was free, my husband said that it was okay. That began my quest for a simple sorbet or ice cream recipe.

When someone gave us two homegrown watermelons, my husband chopped them up and we ate a whole watermelon in one sitting. But, we still had a lot of leftover watermelon so I decided to make some sorbet.

I also made some mango sorbet with this recipe. Sorry, but I forgot to take pictures. This is a really simple and delicious recipe. The original recipe called for 1 1/4 cups of sugar. I added 1 cup, but it was a bit sweet for us. Depending on the sweetness of the fruit, I wouldn't add too much sugar. Maybe none at all.


Watermelon Sorbet
adapted from Alton Brown


1 pound, 5 ounces watermelon cut (approximately, one large, Corelle bowl of fruit)
3 tablespoons of freshly squeezed lemon juice
2 tablespoons vodka (keeps mixture from freezing into one large popsicle)
3/4 cups sugar (or less if fruit is really sweet)


1. Place cut watermelon in a blender or food processor.


2. Blend until smooth.

3. Add lemon juice, vodka, and sugar, and blend until fully mixed.

4. Place mixture in the freezer until it reaches 40 degrees (one hour or so).


5. Pour chilled mixture into ice cream maker.


6. Process according to manufacturer's directions.

7. Transfer into airtight container and place in freezer for 3-4 hours.


My children couldn't wait for the sorbet to set in the freezer. We ate it as soon as it was done in the ice cream maker. It was a bit sorbet, granita-like and refreshingly cool and delicious. Hope you enjoy!

Another way to make this recipe without an ice cream maker:
1. Place mixture in an airtight bowl in the freezer.
2. Every hour, break up the ice that forms and mix.
3. After a few hours, you will have an icy treat.


Tuesday, August 28, 2012

Baked French Toast

Okay, so this is not a healthy breakfast recipe, but I had to make it for A3's birthday. I had to, I tell 'ya! It a special treat that comes out on special occasions, when we have to feed a large group breakfast, or when I have a loaf of day old french bread. I like that I don't have to fry a million slices of bread... on both sides.

My sister gave me a recipe for baked french toast many years ago when I needed to make breakfast for 20+ adults very early in the morning. This is a great recipe to make ahead, take out the day of, bake, and enjoy. My kids go crazy for this! I used to make a huge pan and eat it throughout the day. Yes, it is that good!


I apologize for the lack of pictures and for the bad lighting. I made everything and realized that I should have taken pictures. The picture above shows the french toast before it went into the oven.

Please use real butter.

Please use real maple syrup.


Baked French Toast

1 French bread baguette (12" or so) (cut into 1" slices)
[I used a raisin brioche loaf I had in the freezer.]
1/2 stick butter (room temperature)
6 eggs
1 1/2 cups milk
1 teaspoon vanilla
1/2 teaspoon salt

maple syrup

(for this recipe I also used 1 teaspoon of cinnamon)


  1. Spread butter over the bottom and sides of a deep baking dish.
  2. Spread butter on both sides of bread slices.
  3. Arrange slices of bread in the baking dish.
  4. Beat eggs, milk, vanilla, cinnamon, and salt in a bowl.
  5. Pour over bread. 
  6. Turn slices to coat with mixture.
  7. Cover with plastic wrap.
  8. Refrigerate overnight.
  9. The next morning, take out of refrigerator and let sit on counter for 20 minutes.
  10. Preheat oven to 400 degrees.
  11. Bake 10 minutes and turn bread slices over.
  12. Bake for another 10(+) minutes until golden brown.
  13. (You can also not turn the bread slices over and just bake for 20 + minutes until golden brown.)
  14. Serve with maple syrup.


Thursday, August 23, 2012

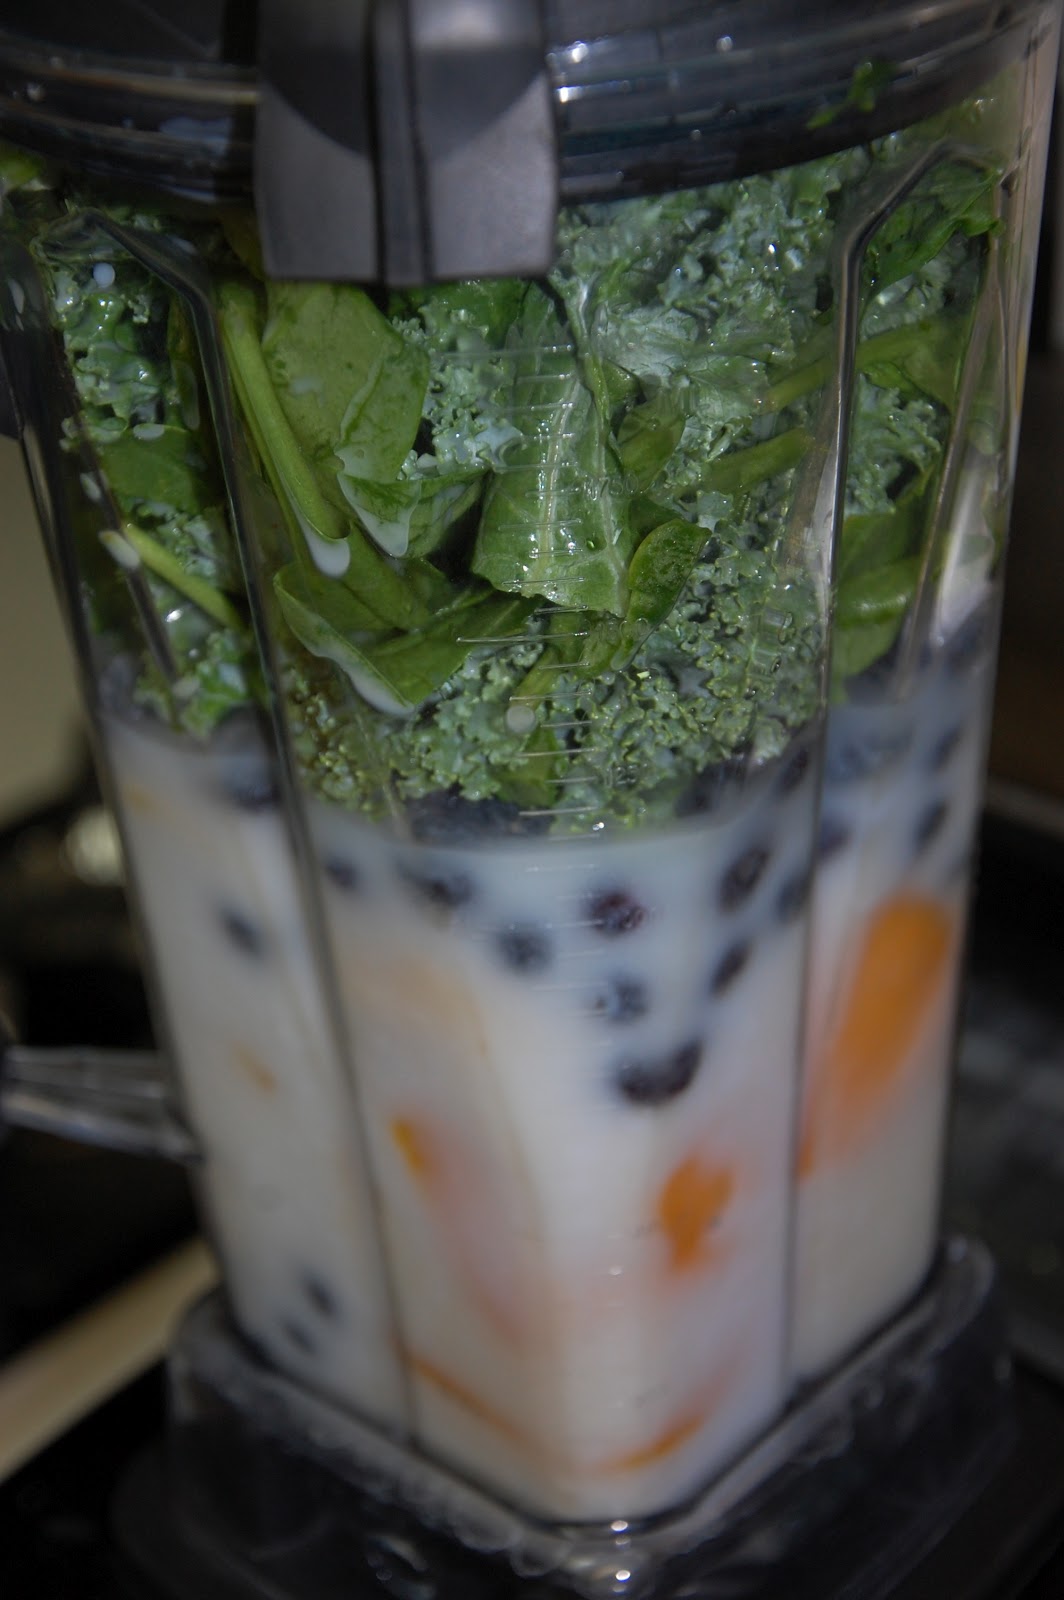
Mango, Blueberry, Banana Green Shake

Two weeks before we left for South Carolina, we had a "HOORAY" moment at our home. My younger two, A2 and A3, asked if they could try some of my green shake. Then, are you ready for this, they asked for more! I couldn't believe it.


In the past, we had made fruit based shakes for them with carrots (which are quite sweet) and a little bit of greens. That was as far as we could push it. Many times, I had tried to get them to have a sip of Momma's shake, but it didn't really work. Or, they would try it and say "yuck" because they knew that it was full of kale and other vegetables - not necessarily because of the taste.


Well, I don't know what happened a few weeks ago, but A2 and A3 wanted me to make more of the green shakes. Each day, A2 would ask if I could make her a shake and then A3 would follow. We would have them with our dinner.


Mango, Blueberry, Banana Green Shake

2 stalks of kale with the stems removed
1 handful of spinach
1-2 cabbage leaves
1 carrot
1 generous handful of blueberries
1 cut mango (which I froze ahead of time)
1 banana (which I froze ahead of time)
1-2 cups of rice milk
1 cup of coconut water

1. Place the harder fruits and vegetables on the bottom.
2. Place the softer fruits and vegetables on the top.
3. Fill with rice milk and coconut water (add more to make less thick).
4. Mix in blender.
5. Enjoy and expect to become really regular!


My theory: I believe that the more your children see you enjoying green shakes (or vegetables) and keep trying little sips of it, they will come to enjoy them also. Just a theory, not a proven fact. But, be patient and try it. It just might work!


Tuesday, June 12, 2012

Green Shake (that turned purple)

We were really blessed last year with a Vitamix mixer. One day, a huge and heavy box came in the mail. At first, we weren't even sure who had sent it to us. It was such a blessing. Made me cry. THIS is how good God has been to us! We use it all the time.

When I don't feel like chewing on vegetables (I know, sounds a bit lazy), we get the mixer out and throw in a bunch of vegetables and some fruit. A huge mound of vegetables turns into a drinkable concoction. So much easier... I also make a shake when I know that I am going to be a bad girl and eat something that I shouldn't. Or, after I have been a bad girl and eaten something that I shouldn't. Drinking green shakes make me feel a bit better. I might also add that green shakes do a great job of clearing your system...

I go to Whole Foods once a week, and I usually get a few staple "shake" ingredients: organic kale, carrots, pears, cabbage, and frozen blueberries. We also use rice milk, bananas, chia seeds, and the new discovery of coconut water. I throw these things into the mixer and have a great tasting shake. No added sugar.

You can add nuts to your shakes to add more flavor. I choose not to add nuts because A2 and A3 have nut allergies. We wash the mixer well, but I don't want to risk any emergency room visits.

I don't know if it's just me, but I don't need as many sweeteners as before. The more vegetables I eat, the less sweeteners I need. My goal is to become less dependent on sweeteners. Those of you that know me well know what a sugar addict I was. But ripe bananas and carrots do a great job of sweetening up a shake. Really!

There are so many "green shake" recipes out there. Quite honestly, there could be a million more. The reason is that you can use so many different ingredients and you can tweak it to match your tastes. Here is one version of a green shake that turned purplish. Use what you have.


Green Shake (that turned purple)

2 kale stalks
1 ripe banana
1/2 cup of blueberries
1/2 - 1 cup of rice milk
1/2 cup of coconut water
1 scoop of coconut ice cream (someone made this for me and I thought that it would taste good in the shake)

1. Wash kale. Tear off leaves from stem. Use only leaves.
2. Place all ingredients into a mixer and blend.
3. General rule for mixer: place soft items on bottom and harder items on top.
4. Drink.


Turned purple because I used extra blueberries because I didn't have any carrots.

My friend made this coconut milk ice cream especially for me with this very cute label.


Thursday, June 7, 2012

Simply Tiramisu


This is a super simple recipe for tiramisu. I got this recipe from my homeschooling cousin who has toddler twins, a 6 year old, grinds her own grain, and bakes her own bread. She gave it to me years ago but she forgot about it. I had to reteach it to her. But, this is a tested recipe that I have made again and again... when our budget allowed. It is decadent, rich, not too sweet, and simply delicious.

One thing: you need to make this and let it sit in your refrigerator for at least 24 hours. That gives all the ingredients a chance to soak in. I once made this the day that we were going to someone's house. When we ate it, it wasn't quite right. I realized that this recipe needs time. Please listen to me and make this ahead of time. You will be thankful for waiting.

Sorry about the pictures. I made this at night and the lighting was not ideal.


Simply Tiramisu

6+ cups of strong, strong coffee (cooled)
1 tub of marscapone cheese (16 oz.)
6 egg yolks
2 Tblspn. sugar
heaving whipping cream
3 packages of lady fingers (there are 4 in one bag of lady fingers)
dark chocolate (or unsweetened cocoa powder)


1. Make strong, strong coffee. You want the flavor so don't skimp. Use a lot of coffee grounds and use a high quality coffee (not instant). Pour in bowl and let cool. I used a French press.


2. Separate yolks from egg whites. Place yolks over a pan of boiling water. Continuously mix yolks so that they don't scramble. Eventually, they will look paler and will be a bit runny. Take off double boiler and let cool. (You don't have to do this but I like to cook the yolks rather than use raw yolks).


3. Once cool, place egg yolks in bowl with marscapone cheese and 2 tablespoons of sugar. The sugar doesn't seem like much but it is enough. Mix until smooth.


4. To make the mixture a bit "lighter," add a bit of heavy cream. As the mixer is turning, you want to add around 1/4 cup of the heavy cream. You might need a bit more. Watch and see the mixture "fluff up."


5. Dip lady fingers and place in desired pan. Don't dip them for too long (soggy) or too short (dry) of a time. The pan I used fits one package of lady fingers for each layer.


6. There are 3 layers, so you have to eye 3 portions of the marscapone mixture. Spread one layer and then add another layer of lady fingers dipped in coffee. Do this until you have 3 layers. The top layer should be of the marscapone mixture.


7. Top with grated dark chocolate or sifted, unsweetened chocolate powder.