When I came across this recipe, I gasped. How could it be possible? How was it that no flour was used? How could I get my kids to eat it? So many questions... all I had to do was make it and get some people to taste test for me.
I apologize for no pictures, but it was dark, chocolate-fudge-brownie-like. And it was very good.
I pulled this recipe out, and A3 saw it. He said, "Yum Mom, can you make more?"
Hope to make these some time this week! Will try and take pictures and post them later.
Vegan Black Bean Brownies
adapted from mealmakeovermoms.com
1 can black beans (rinsed and drained)
1/3 very ripe banana
6 tablespoons of unsweetened applesauce
2 teaspoons vanilla extract
1/2 cup sugar
1/2 cup unsweetened cocoa powder
1/8 teaspoon salt
1/2 teaspoon baking powder
optional:
1 tablespoon instant coffee
1/2 cup semi sweet chocolate chips
3 eggs instead of 6 tablespoons applesauce (for a non-Vegan version)
1. Preheat oven to 350 degrees.
2. Place beans in food processor and mix until smooth.
3. Add bananas and applesauce and blend.
4. Add vanilla extract, sugar, cocoa powder, salt, and baking powder.
5. Blend together.
6. **You can also add half of your chocolate chips and blend.
7. Line brownie pan with parchment paper for easy pan removal.
8. Pour batter into pan (can place remaining chocolate chips on top).
9. Bake for 20 minute intervals, checking to see if a toothpick comes out clean.
10. It took me over 1 1/2 hours to bake because of the applesauce. If you use eggs, it can take 35 minutes.
Showing posts with label Healthy Living. Show all posts
Showing posts with label Healthy Living. Show all posts
Wednesday, October 31, 2012

Monday, October 8, 2012
Coconut Hot Oil Treatment for Hair

I could tell that the weather was getting colder because my coconut oil solidified. This is the jar that I keep in my medicine cabinet. I use it to remove my makeup at the end of the day. During the summer months, it was in clear, liquid form. It was really interesting to watch the changes in the weather and in my coconut oil. Coconut oil turns into liquid form as soon as you touch it because it has a melting point of around 75 - 76 degrees.
Coconut oil can be used in so many ways. It can be used for cooking, makeup removal, shaving, as a moisturizer, and today I am going to show you how to use it as a hot oil treatment. You know, like those Vidal Sassoon hot oil treatments that were all the rage in the 80's and 90's.
A week and a half ago, I gave it a try because it was said to soften and help hair regrowth. Personally, I needed both of those results. Here are the steps that I took:
Coconut Hot Oil Treatment for Hair
- Heat 1/4 cup (might need up to 1/2 cup if you have longer hair) of coconut oil in the microwave for 20 seconds (or until warm).
- Make sure the coconut oil is not too hot.
- Spread the oil into your hair using your fingers.
- Massage into scalp and hair.
- If your hair is long enough, tie into a ponytail.
- If your hair is not long enough, spread hair across your head.
- Have another person, plastic wrap your hair around your head. My husband thought that I was really weird, but he did it for me.
- Wait 1-2 hours or sleep with your plastic wrapped head.
- Shampoo a few times to get the oil out of your hair.
- Condition and style as usual.
Monday, October 1, 2012
Carrot, Apple, Green Shake

This was my dinner a few nights ago. You would be surprised at how full you get from drinking a green shake. During the day, I ate something that wasn't so healthy so I needed to balance things out. It is easier and less time consuming to drink my veggies vs. eating them. You would be really surprised at how full you get from one of these shakes. I get the food, nutrients, and energy, to get me going until the next meal. Wouldn't think it, but it's true.

As you know, I really enjoy watching documentaries. Lately, it has been documentaries about food. I really encourage people to watch these types of documentaries. Awareness... it is really enlightening. Like I have said many times before, don't wait until you are sick. Here are some of the food documentaries I saw on Netflix:
Food, Inc.
Food Matters
Fat, Sick & Nearly Dead
Deconstructing Supper
Supersize Me (I think this was the title)
Carrot, Apple, Green Shake
1 apple (with peel, no core)
1 banana
2 carrots
2 purple cabbage leaves
2 tablespoons raw sesame seeds
3 tablespoons raw sunflower seeds
1-2 cups ricemilk
1 cup coconut water
1. Cut hard vegetables and fruits.
2. Put in blender.
3. Mix.
4. Expect to be full.
Tuesday, July 10, 2012
Simple Breakfast
Sometimes, it is a hassle to eat breakfast. Too many things to do in the morning. Too many things to remember to grab before I run out of the house. Too little time. That is when I grab a simple yet nutritious breakfast: a handful of raw almonds and dried cherries.

I used to force myself to eat the raw almonds but it became a bit tedious. They were so plain and non-toasted-almondy. I tried them with some dried cranberries. Not bad. But when I tried the almonds with dried cherries, I knew I had found a winning combination.
This breakfast is rich in protein, amino acids, dietary fiber, B vitamins, essential minerals, and flavonoids. It gives me the energy I need until lunch without giving me the "shakes." This breakfast or snack can also be easily transported in your purse or man-purse.

I used to force myself to eat the raw almonds but it became a bit tedious. They were so plain and non-toasted-almondy. I tried them with some dried cranberries. Not bad. But when I tried the almonds with dried cherries, I knew I had found a winning combination.
This breakfast is rich in protein, amino acids, dietary fiber, B vitamins, essential minerals, and flavonoids. It gives me the energy I need until lunch without giving me the "shakes." This breakfast or snack can also be easily transported in your purse or man-purse.
Thursday, June 28, 2012
Super Simple Homemade Lotion
Last week, I was down to my last drops of homemade beeswax cream. My skin was dry and I needed to make more cream. But, our schedule was so crazy! Then, this recipe fell on my lap! AND it was super duper simple. Really. All you need are a few ingredients and a blender or immersion blender.
The last time I made body cream, I made a lot. A lot lot. So much that I couldn't use it all before the allotted time to use it. So when I found this super, simple recipe that makes little batches at a time, I was sold. Trust me. If I can do it, you can too!
Super Simple Homemade Lotion
adapted from gorgeouslygreen.com
1 tablespoon coconut oil
1 tablespoon shea butter
2 tablespoons sweet almond oil
2 teaspoons aloe vera gel
10 drops essential oil
1 dark colored glass container
rubbing alcohol
paper towel

1. Place all ingredients in a blender or immersion blender cup.

2. Mix.

3. Put some rubbing alcohol on a paper towel.

4. Rub the inside of the glass container (sterilize).
5. Use. Should be good for a few months, but I think that it will be gone by then.

*There is some grit to this lotion due to the shea butter. But, it quickly as you rub the lotion onto your skin. If you are a bit, how can I say this, anal, you can melt the ingredients in a double boiler, let cool, add essential oils, and then mix together. No grit.
The last time I made body cream, I made a lot. A lot lot. So much that I couldn't use it all before the allotted time to use it. So when I found this super, simple recipe that makes little batches at a time, I was sold. Trust me. If I can do it, you can too!
Super Simple Homemade Lotion
adapted from gorgeouslygreen.com
1 tablespoon coconut oil
1 tablespoon shea butter
2 tablespoons sweet almond oil
2 teaspoons aloe vera gel
10 drops essential oil
1 dark colored glass container
rubbing alcohol
paper towel

1. Place all ingredients in a blender or immersion blender cup.

2. Mix.

3. Put some rubbing alcohol on a paper towel.

4. Rub the inside of the glass container (sterilize).
5. Use. Should be good for a few months, but I think that it will be gone by then.

*There is some grit to this lotion due to the shea butter. But, it quickly as you rub the lotion onto your skin. If you are a bit, how can I say this, anal, you can melt the ingredients in a double boiler, let cool, add essential oils, and then mix together. No grit.
Tuesday, June 19, 2012
Organic Make Up Remover
Coconut oil. That is all you need. It is easy to use. It is chemical free. It even moisturizes your face. You just rub some on your face and wipe off with a tissue. Then continue with your cleansing routine.

The jar above contains 14 ounces. I think that I paid $10 for it. I have used it for making lotions, cooking, and taking my makeup off. I started using it as an eye makeup remover when I ran out of the one that I was using. I had read in many blogs that it could be used as make up remover, so I gave it a try. When this worked, I started using it to take off the rest of my makeup.

Coconut oil has a melting point of 76 degrees. When I bought the jar above, it was cold outside so it stayed solid white. As the weather got warmer, the solid white turned to a clear oil. This does not change the quality of the oil. It is still usable. It still has all the properties it had as a solid, so do not fret.
Some of you might be wondering about the smell. Yes. It smells like coconut. I got used to it. If this person with the sensitive shnoz can handle it, I am positive that you can too.
The best part is that this make up remover is organic, natural, paraben, phthalate, not-good-for-you-chemical-free!

The jar above contains 14 ounces. I think that I paid $10 for it. I have used it for making lotions, cooking, and taking my makeup off. I started using it as an eye makeup remover when I ran out of the one that I was using. I had read in many blogs that it could be used as make up remover, so I gave it a try. When this worked, I started using it to take off the rest of my makeup.

Coconut oil has a melting point of 76 degrees. When I bought the jar above, it was cold outside so it stayed solid white. As the weather got warmer, the solid white turned to a clear oil. This does not change the quality of the oil. It is still usable. It still has all the properties it had as a solid, so do not fret.
Some of you might be wondering about the smell. Yes. It smells like coconut. I got used to it. If this person with the sensitive shnoz can handle it, I am positive that you can too.
The best part is that this make up remover is organic, natural, paraben, phthalate, not-good-for-you-chemical-free!
Tuesday, June 5, 2012
Ant Wars, Part II
I apologize for the lack of posts. I've been tired. I've been foggy and groggy. I haven't had the energy to write. There was a bit of mental energy strain last week and not enough for writing here. But I do want to continue with my reporting on the ant wars that have been taking place in our home.

The ants have come and gone. There have been times that I would find a lone ant in a place that I hadn't seen one before and I would load up on more natural ant killer. They are currently lining one of my walls. Then, the ants would disappear. At this moment, I am very happy to report that I have not seen any ants. But we don't know what tomorrow will bring.
This is the recipe that an A-girl showed me. She had had some ant problems and this seemed to work for her. Hope that it helps.
By the way, save all of those plastic, take-out lids! They work great for this.
Also, I filled a couple of large yogurt containers (that have lids) with soaked cotton balls of this ant killer inside. I cut little triangles on the sides (down low) so that the ants could go in. I placed these containers outside near a spot that I had seen a lot of ants. I went outside last week to see how things were going and there were A LOT of ants inside that container. Some alive, some not so alive.
If you have a natural way to get rid of these pests, please share your story.
Natural Ant Killer
from food.com
1 cup of sugar
3 Tblspn. borax
3 cups of warm water
1. Mix sugar and borax well.
2. Add warm water and stir.
3. Store in a jar.
4. Saturate a cotton ball.
5. Place on a jar lid.
6. Grab stray ants and throw them on the cotton ball to get things started.
7. Wait.
8. When the cotton balls dry, rewet.

The ants have come and gone. There have been times that I would find a lone ant in a place that I hadn't seen one before and I would load up on more natural ant killer. They are currently lining one of my walls. Then, the ants would disappear. At this moment, I am very happy to report that I have not seen any ants. But we don't know what tomorrow will bring.
This is the recipe that an A-girl showed me. She had had some ant problems and this seemed to work for her. Hope that it helps.
By the way, save all of those plastic, take-out lids! They work great for this.
Also, I filled a couple of large yogurt containers (that have lids) with soaked cotton balls of this ant killer inside. I cut little triangles on the sides (down low) so that the ants could go in. I placed these containers outside near a spot that I had seen a lot of ants. I went outside last week to see how things were going and there were A LOT of ants inside that container. Some alive, some not so alive.
If you have a natural way to get rid of these pests, please share your story.
Natural Ant Killer
from food.com
1 cup of sugar
3 Tblspn. borax
3 cups of warm water
1. Mix sugar and borax well.
2. Add warm water and stir.
3. Store in a jar.
4. Saturate a cotton ball.
5. Place on a jar lid.
6. Grab stray ants and throw them on the cotton ball to get things started.
7. Wait.
8. When the cotton balls dry, rewet.
Tuesday, May 1, 2012
Naturally Good Sunscreen
Sunscreen is something that all of us should be using to protect our skin. It protects against harmful UVA/UVB rays and helps prevent wrinkles. Whenever I read an article about skincare, sunscreen is always emphasized. BUT, what about that smell? Exactly!
Smell is a big deterrent for me. I don't like smelling like I just went to the beach unless I am at the beach. I've tried many different products. No matter what product I've used, that smell always seemed to be there. This included facial and body lotions.
That greasy feeling was another yuck. I already had oily skin in my t-zone, I didn't need more grease. The thought of putting lotion and, then, sunscreen was another oil disaster waiting to happen.
Don't get me started on the white cast it left. My kids have come to me with streaks of white on their shiny faces...

Then I came across this stuff. It does not smell like sunscreen. It is 70% organic, 100% natural. I can't tell you how happy I was to have found this stuff. I use it everyday after putting on lotion. Quite honestly, you might even be able to use this as your lotion/sunscreen. The sunscreen glides on very smoothly and you use very little of it. Let me reiterate: use sparingly because that is all you need. And, it doesn't leave you looking like Casper the Friendly Ghost!

I use it on my face and neck. Neck? Yes, neck. Your neck needs love too. It needs even more love when you're in your 40s. My neck is also the place where my what-happened-to-you, thyroidectomy scar is located. I need to protect it against the sun or else the scar will discolor more. It already looks like a red worm on my neck, I need it to fade gracefully. Sunscreen and vitamin E are key.
Okay, now the price. That is what you were waiting for, right. It is $29 for 2.25 ounces. I expect to use this for many months. I wouldn't be surprised if it lasted me a year - of daily use. Like I mentioned earlier, you don't glob it on. You use very little. Read the box when you get it.
When I find a super recipe or super product, I can't help but share it with others. That's the kind of person I am. I hope that this is helpful!
Smell is a big deterrent for me. I don't like smelling like I just went to the beach unless I am at the beach. I've tried many different products. No matter what product I've used, that smell always seemed to be there. This included facial and body lotions.
That greasy feeling was another yuck. I already had oily skin in my t-zone, I didn't need more grease. The thought of putting lotion and, then, sunscreen was another oil disaster waiting to happen.
Don't get me started on the white cast it left. My kids have come to me with streaks of white on their shiny faces...

Then I came across this stuff. It does not smell like sunscreen. It is 70% organic, 100% natural. I can't tell you how happy I was to have found this stuff. I use it everyday after putting on lotion. Quite honestly, you might even be able to use this as your lotion/sunscreen. The sunscreen glides on very smoothly and you use very little of it. Let me reiterate: use sparingly because that is all you need. And, it doesn't leave you looking like Casper the Friendly Ghost!

I use it on my face and neck. Neck? Yes, neck. Your neck needs love too. It needs even more love when you're in your 40s. My neck is also the place where my what-happened-to-you, thyroidectomy scar is located. I need to protect it against the sun or else the scar will discolor more. It already looks like a red worm on my neck, I need it to fade gracefully. Sunscreen and vitamin E are key.
Okay, now the price. That is what you were waiting for, right. It is $29 for 2.25 ounces. I expect to use this for many months. I wouldn't be surprised if it lasted me a year - of daily use. Like I mentioned earlier, you don't glob it on. You use very little. Read the box when you get it.
When I find a super recipe or super product, I can't help but share it with others. That's the kind of person I am. I hope that this is helpful!
Monday, April 23, 2012
Floor Cleaner

Cleaning laminate floors is a daily chore. Unlike carpet, you can see all the dust, crumbs, and hair, on the floor. When we first got laminate flooring, I dusted and cleaned the floors daily. After a year or so, I dusted daily, but waited a few days to clean the floors with a wet cleaner.
Then, I got sick. It all seems to come to that. My turning point. It was at that point that I started to become aware of unnecessary chemicals in our home. My ears would perk up when people would talk about the effects of chemicals in our lives. At that point, someone told me that those wet antibacterial floor wipes weren't so good for you. Makes sense: wet chemicals on floor - bare feet - unnecessary chemical exposure. You get the picture.
Well, I was shown an alternative. The Rubbermaid floor cleaner. I think that I got it for $24 at Target, and I've seen it on sale for $20. You get to fill the container with whatever floor cleaner you want to use and the pad on the bottom is reusable and washable. I fill mine with 1/4 vinegar and 3/4 water.
Yes, it does smell like vinegar when you spray. But, as soon as the solution dries, there is no smell. Ask my children. Ask my husband.
In the past when I had used antibacterial floor wipes, I always felt a slight stickiness to the floors. I tried to get rid of it, but I think that it was just the chemical residue of the floor wipes. When I switched to the vinegar and water solution, my floors were squeaky clean. AND, no chemical smell!
One thing: I don't like to use the Rubbermaid in the bathrooms. I don't like to use what I use to clean the bathroom in other parts of the house. My quirk. I will spray with my handy dandy spray bottle and wipe with paper towels.
Wednesday, April 18, 2012
My Trusty Cleaners

These are my trusty friends. I keep one in the bathroom and the other on the kitchen counter. I bought them at the Target dollar section. I chose different colors so that I wouldn't mix them up. The thought of having the bathroom one (orange) in the kitchen grosses me out. I am like that sometimes.
They are both filled with a water and vinegar mixture. I put half of each in the bottles. Then, I spray and wipe. In the bathroom, I spray the mirrors, around the sink, shower curtains, tiles, and in those areas that smell a bit. Vinegar kills mold, kills bacteria, and works as a deodorizer. The best part is that it is all natural!
In the kitchen, I use it to clean the counters after a meal. It takes away smells and stickiness. I also spray down the kitchen table and wipe away all traces of food.
Okay, now I will answer the question that all of you have been waiting to ask, "BUT, doesn't your house smell like vinegar?" The answer: yes, at first. But, as soon as the mixture dries, the smell is gone. REALLY. REALLY. REALLY. Your house ends up smelling really clean. Naturally clean. Not chemically clean.
Monday, April 2, 2012
Rose Oil to the Rescue
Remember my post about rose oil? Well, I have to tell you a short story. My sister-in-law gets this rash/bumps on her face when she is too tired. It started to occur after her major back surgery two years ago (got metal supports in her spine). She went to the doctor but they prescribed some strong medication. Whenever the rash occurred, she would put some of this medicine on. The problem was that it occurred quite often and she became dependent on that medication.
After being here for a week, my sister-in-law got the rash again. She put some medicine on (she brought the lower dose cream) but it wasn't really working. I suggested some rose oil and she used it on Thursday night. When she woke up on Friday, she told me that it had brought her rash down. She asked me to order five for her to take back to Korea. She also said that the rose oil smell wasn't so bad. It reminded her of the smell of the oil they use for facial massages.
After being here for a week, my sister-in-law got the rash again. She put some medicine on (she brought the lower dose cream) but it wasn't really working. I suggested some rose oil and she used it on Thursday night. When she woke up on Friday, she told me that it had brought her rash down. She asked me to order five for her to take back to Korea. She also said that the rose oil smell wasn't so bad. It reminded her of the smell of the oil they use for facial massages.
Tuesday, February 14, 2012
Argan Oil
My hair has some wave to it, especially when it is shorter. If I don't blow dry it, there are a million collicks going in a million different directions. The positive is that I don't have to get a "roll straight perm" to get volume when I have shorter hair. It just puffs without a perm. I know this because someone pointed it out to me when I had shorter hair. Who knew?
In my quest to go more truly natural, not chemical natural, I started searching for an all natural product to tame my frizzies. I also needed something natural because my hormones were making me lose a lot of hair. Handfuls of it. Everyday. Still...
That was when I ran across the brand name version of argan oil which costs a lot of money at salons. As I read the reviews, people commented that the expensive version was basically argan oil. I looked up organic argan oil and BAM, found it on Amazon. For a fraction of the price, I could purchase 100% organic argan oil.

Can I tell you how smooth it makes your hair feel? From the first time that I tried it, I could feel the difference. I kept touching my hair. You basically put 2 drops of the oil into the palms of your hands. Then, you smooth it through the ends of your wet hair before blow drying. Depending on the length of your hair, you need to use this oil in moderation. I learned the hard way. Once, I put 5 drops and it was disastrous. My hair looked like I hadn't taken a shower for a few days. I had to wash my hair again before going out. If your hair is shorter and finer, one drop might do the trick.
When I got this bottle, it stated that it could also be used as a moisturizer. I look it up and was shocked to see all the tremendous reviews about argan oil as a moisturizer. There is a former model who has her own line but that is also more expensive. The bottle I purchased above was $17. The bottle is small but you use very little. I wash my face, use a toner, argan oil, and some cream. The argan oil tightens your skin and really soaks in (even though I have an oily t-zone). I put cream on those areas that are a bit drier, due to my hormones/winter. The scent is a bit like olives to me. A very mild smell.
I had used the rose oil for a few months to see the results, and I really liked it. Now, I wanted to try argan oil because of all the great reviews I had read. I am going to try this for the next couple of months and see if I like this better than the rose oil.
In my quest to go more truly natural, not chemical natural, I started searching for an all natural product to tame my frizzies. I also needed something natural because my hormones were making me lose a lot of hair. Handfuls of it. Everyday. Still...
That was when I ran across the brand name version of argan oil which costs a lot of money at salons. As I read the reviews, people commented that the expensive version was basically argan oil. I looked up organic argan oil and BAM, found it on Amazon. For a fraction of the price, I could purchase 100% organic argan oil.

Can I tell you how smooth it makes your hair feel? From the first time that I tried it, I could feel the difference. I kept touching my hair. You basically put 2 drops of the oil into the palms of your hands. Then, you smooth it through the ends of your wet hair before blow drying. Depending on the length of your hair, you need to use this oil in moderation. I learned the hard way. Once, I put 5 drops and it was disastrous. My hair looked like I hadn't taken a shower for a few days. I had to wash my hair again before going out. If your hair is shorter and finer, one drop might do the trick.
When I got this bottle, it stated that it could also be used as a moisturizer. I look it up and was shocked to see all the tremendous reviews about argan oil as a moisturizer. There is a former model who has her own line but that is also more expensive. The bottle I purchased above was $17. The bottle is small but you use very little. I wash my face, use a toner, argan oil, and some cream. The argan oil tightens your skin and really soaks in (even though I have an oily t-zone). I put cream on those areas that are a bit drier, due to my hormones/winter. The scent is a bit like olives to me. A very mild smell.
I had used the rose oil for a few months to see the results, and I really liked it. Now, I wanted to try argan oil because of all the great reviews I had read. I am going to try this for the next couple of months and see if I like this better than the rose oil.
Monday, February 6, 2012
Steel Cut Oats with Bananas
Last week, I went to Whole Foods and purchased some steel cut oats. I had always wanted to see what the big deal was with these type of oats. I had heard and read a lot about the taste and nutrition, but I was afraid to purchase them because it was unfamiliar to me.
 |
| Steel cut oats (L) and old fashioned rolled oats (R). |
Organic steel cut oats were $1.49/lb. in the bulk section of Whole Foods. I ended up getting $0.44 worth so that we could try it. That amount fed A1, A2, A3, and I. It did take more time to cook than the old fashioned rolled oats but it was very easy to prepare. Steel cut oats are the most minimally processed of the oats, so it takes longer to cook (15-30 minutes). The texture is also chewier and a bit nuttier than regular oatmeal.
 |
| Place bananas in sauce pan and mash with a spoon. |
My children liked the chewier texture and asked if I could make it again. I just made it with the ingredients I had on hand but I think that you can get really creative with the flavors and toppings. I will definitely be going back to Whole Foods and purchasing more.
 |
| The oats thicken as you cook them. |
 |
| Ready to eat. |
Steel Cut Oats with Bananas
1 1/2 cups of steel cut oats
3 cups of rice milk (or more if you like a more watery consistency)
1 banana
1. Place ingredients in sauce pan.
2. Mash up bananas.
3. Place over medium heat.
4. Set timer for 20 - 25 minutes.
5. Bring to a boil.
6. Lower heat to simmer with lid on.
7. Stir every 5 minutes.
Thursday, February 2, 2012
Homemade Beeswax Cream

Who would have thought that I would be making my own body cream? I never did. Who has the time? Who even knows how? Who wants to bother when you can just buy some at Target?
I was going to get on my soap box and tell you about all the dangers in the products that we use, but I won't. I will encourage you read up on the subject and make your own decision. I recently finished reading No More Dirty Looks. It talks about all the surprising chemicals in our makeup/lotions/hygiene products and the lack of regulation in this billion dollar industry. Very informative.
Well, this is a cream that is 100% natural and has no chemicals. I tweaked it a little and am really pleased with the results. I had made a batch a few months ago. It had been the first time that I had made homemade cream and my kids didn't like it, at first. They thought that it smelled too "cocoa buttery." I had also made the mistake of leaving some ingredients out and not mixing it well enough.
This time, I think I got it! My kids were lining up to get their dry, cracked skin creamed. I would lotion one of their legs and have them see the difference. It was quite drastic. I wished that I had taken some pictures...

I purchased most of the ingredients (including the glass jars) at Mountain Rose Herbs. Some of the ingredients were purchased on Amazon or at Whole Foods. You take your pick. I also tried to choose organic products.

My cousin gave me the original recipe. The original required some distilled water. I chose not to use distilled water because water gives it a shorter shelf life (3 weeks). Add water to anything, and it raises the chances of bacteria forming. That is why body products with water have so many preservatives. I substituted the water with aloe vera after watching some lotion making videos. I also used an opaque jar because some of these ingredients are light sensitive.
Beeswax Cream
makes 9 oz.
6 tablespoons sweet almond oil
1 tablespoon beeswax pastilles
1 tablespoon cocoa butter
2 tablespoons coconut oil
1/4 teaspoon vitamin e
1/4 teaspoon lanolin
6 tablespoons aloe vera gel
15-18 drops of essential oil (I used lemon essential oil)
- Place almond oil, beeswax, and cocoa butter in a bowl over boiling water. Melt.
- Add coconut oil. Stir. Melt.
- Let the oil/butters cools to room temperature. It will look slightly opaque when it is cooled down.
- Place aloe in a glass. Place in the pot with hot water to warm up the aloe.
- Blend with a whisk attachment (I used an immersion blender with a whisk attachment).
- Slowly, add the warmed aloe.
- Pour into the cup that is given with the immersion blender or a large cup (this makes it easier to blend).
- Blend until thick, smooth, and creamy.
- Add essential oils (if you want a scent other than the cocoa butter smell), vitamin e, and lanolin.
- Blend well.
- Pour into sanitized glass containers (Wipe the inside with a alcohol).
- Let cool and then cover with lid.
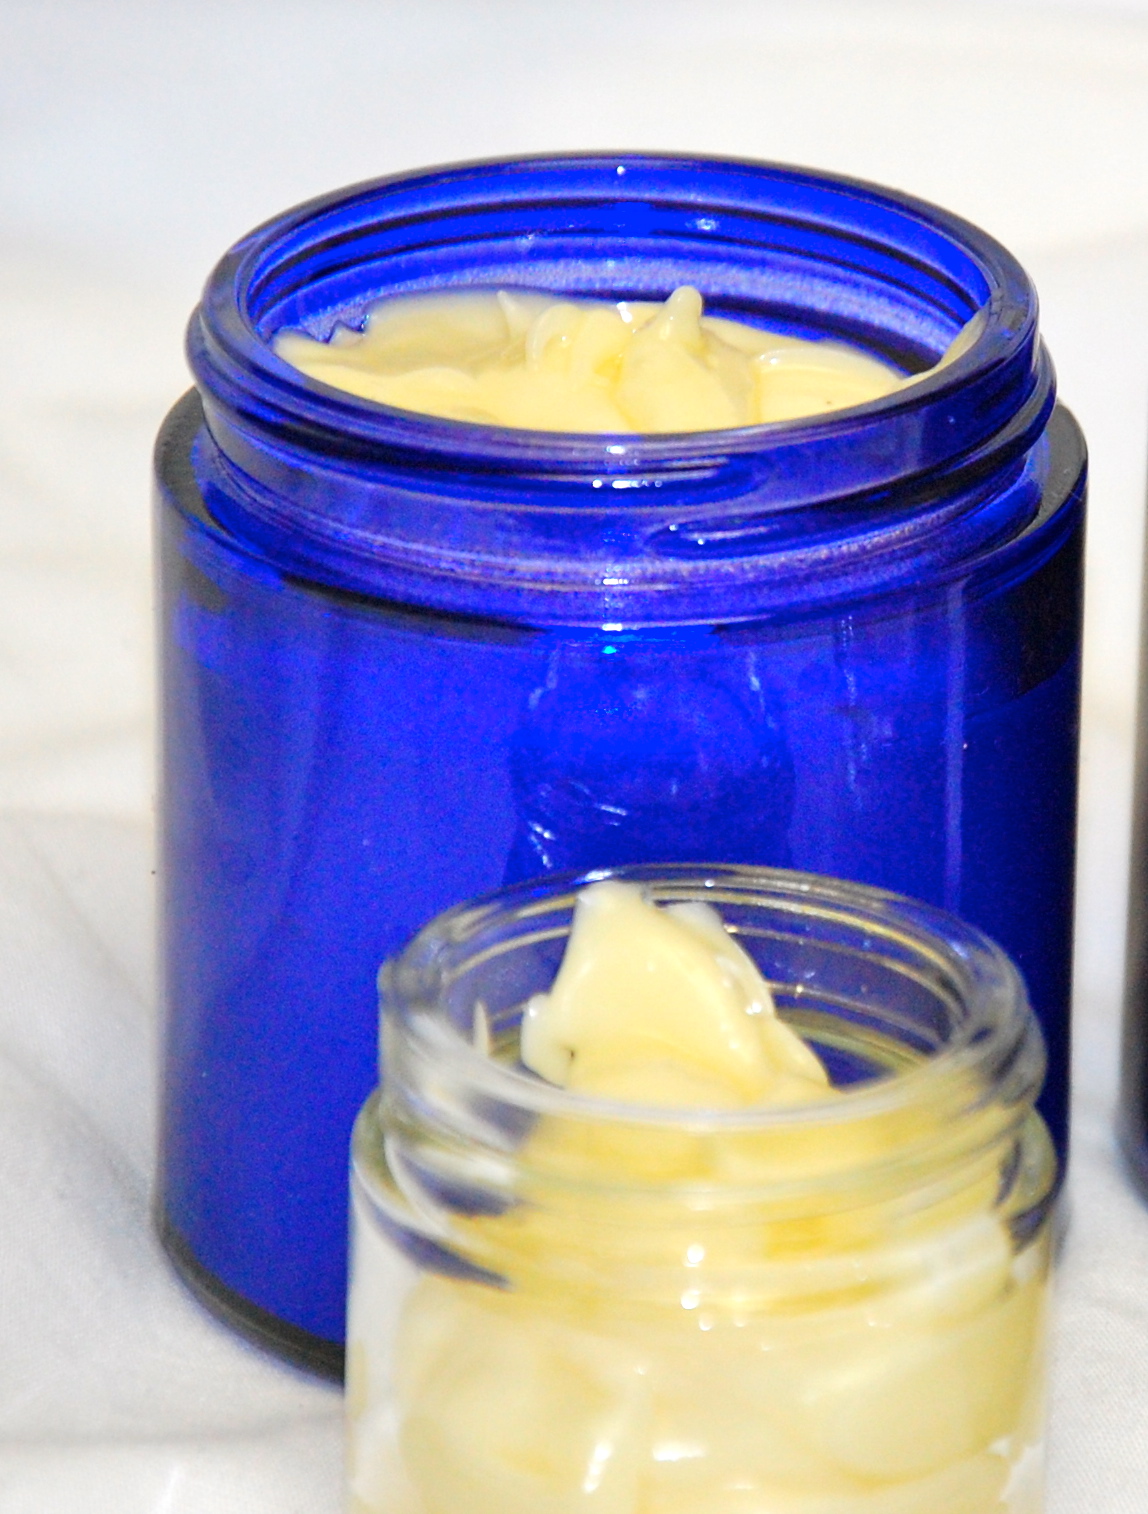 |
Tuesday, January 24, 2012
Chocolate Banana Chia Pudding
I had to share this recipe tonight. This is a variation of the Pumpkin Chia Pudding. This is a healthy, super good, sweet treat. I made this tonight and was blown away by how good it tasted. I liked the pumpkin chia pudding, but this one made me yell, "This is so good!," to my husband (even though he was standing 2 feet from me), It fed my chocolate, sweets, and I-need-a-sweet-snack-after-my-kids-are-sleeping cravings. I ate it all and felt no guilt. No sugar or sweeteners needed! You can eat this for breakfast, as a snack, or for dessert.
Chocolate Banana Chia Pudding
Chocolate Banana Chia Pudding
1 banana (or 2 if you like)
3 tablespoons chia seeds
1/2 cup rice milk
1-2 teaspoons unsweetened chocolate powder
- Place banana in a bowl or glass. Smash with a fork.
- Add chia seeds and rice milk. Mix together.
- Add unsweetened chocolate powder. Mix. Make sure to break up any powder clumps.
- Wait 10-15 minutes. The chia seeds will expand and form a gel.
- Mix again before eating.
Pumpkin Chia Pudding
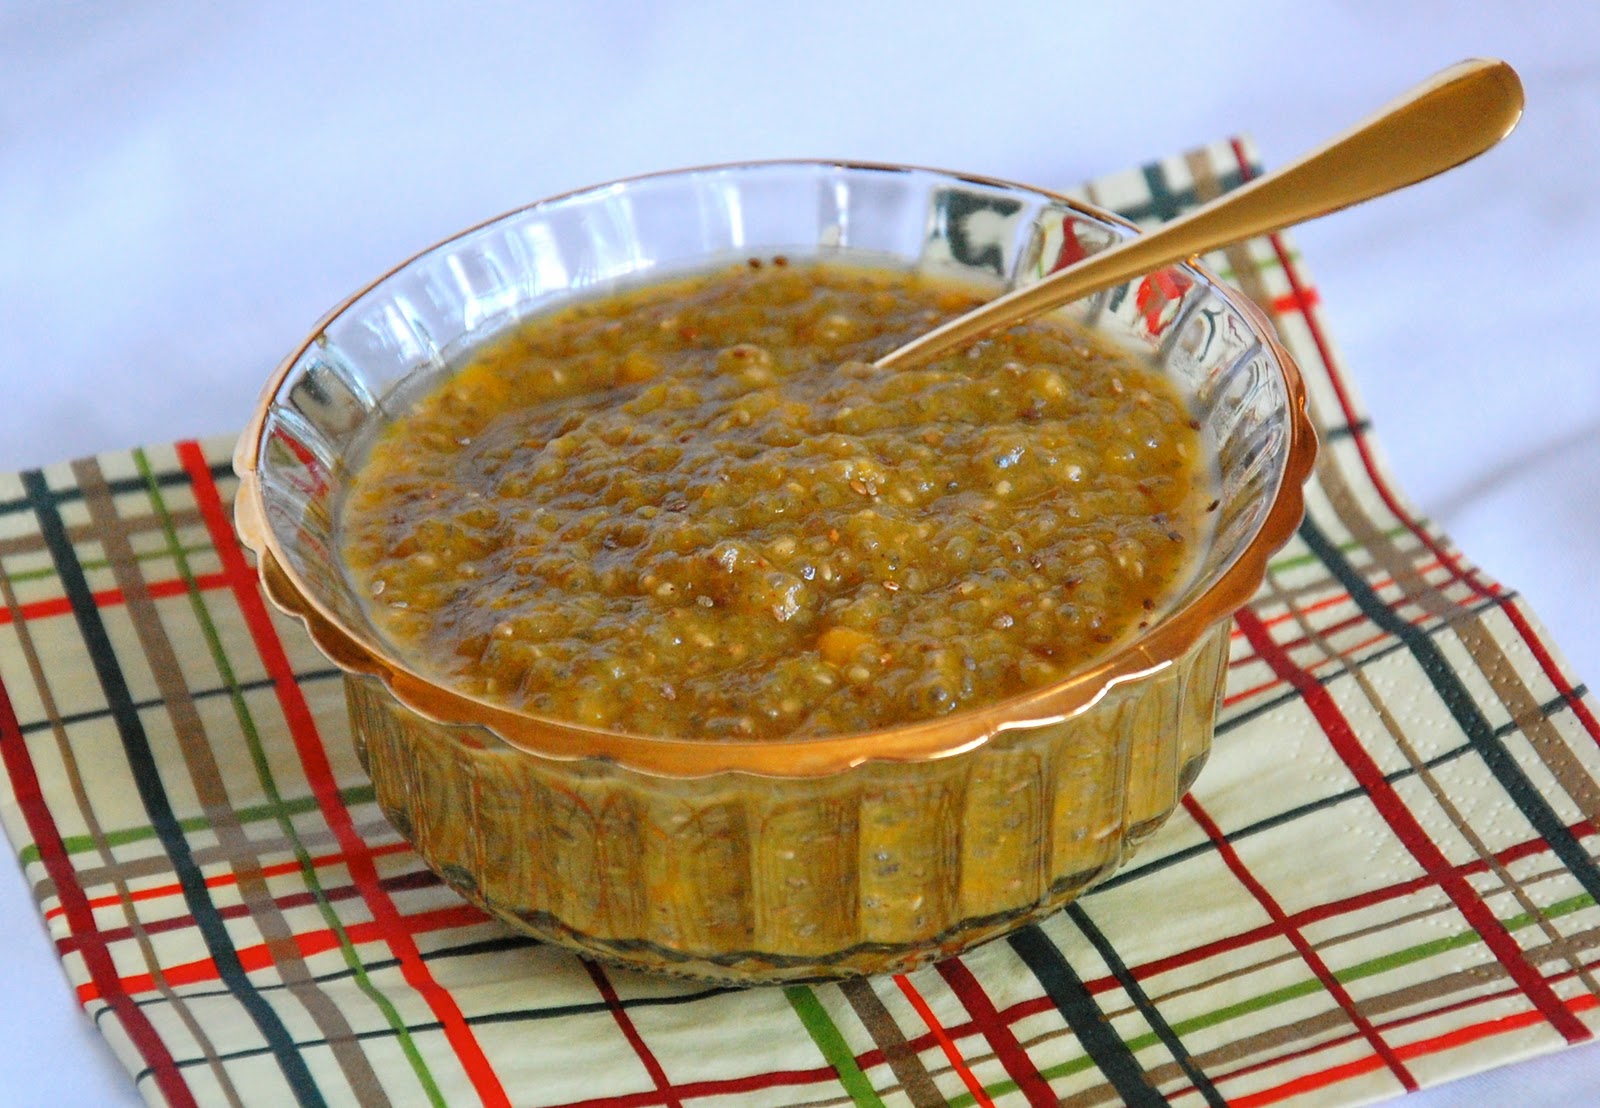
This was something that I had wanted to try for quite some time. I heard that chia seeds + any liquid made a gel-like substance. I just wasn't sure about how it would taste. We put it on our rice and salads, but we had never ventured into the gel zone.
This recipe was surprisingly easy to make and quite good. I tested it on my children, and my older two gave a thumbs up. A3 was holding out. Next time, I think that I am going to try it with bananas and some berries on top. How does cocoa powder and strawberries sound? The possibilities are endless. This is an easy, good-for-you snack, that really fills you up.

Pumpkin Chia Pudding
(adapted from choosingraw.com)
1/2 cup pumpkin puree
3 tablespoons chia seeds
1/2 cup rice milk
2-4 tablespoons of maple syrup (the real stuff) or agave (to taste)
1/2 teaspoon Cinnamon (to taste)
Sprinkle of Nutmeg (to taste)
Put all the ingredients in a glass and mix. Wait 10-15 minutes. The chia seeds will expand and form a gel. Enjoy.
Friday, January 20, 2012
Natural Fabric Softener
Last summer, I bought a t-shirt from a resale shop in my area. It was a brand that I really like, was in excellent condition, and was the right price. When I got it home, I noticed that it had a scent to it. Nothing funky. I think that the store might have sprayed some type of fabric refresher in the store, and it might have gotten on this shirt.
Due to my hormone drugs, I have gotten a bit more sensitive to smells (I already was sensitive to smells). I tried to wear the shirt even though it smelled like fabric refresher but it was too strong for my sensitive nose. Of course, I had washed the shirt before wearing it, but the smell would not go away. So, I washed the shirt, tried to wear it, took it off because of the smell, and then washed it again. I must have washed that shirt 4-5 times. It still smells like fabric refresher.
This other time, I was doing laundry and I dropped the box of fabric softener sheets. I had to pick up the different sheets and put them back in the box. Being the hand washer that I am, I washed my hands after touching the fabric softener sheets. To my dismay, the smell didn't go away. I kept trying to wash my hands with different soaps to try and get the smell off, but it wasn't happening.
After these incidents, I became more aware of the chemical perfumes in products. They are strong, and some do smell good, but do we really need those chemical scents/perfumes? As far as fabric softeners go, you have to think about your skin absorbing all of these chemicals into your body 24 hours a day. Look it up and you will be shocked.
The solution to my problem: white, distilled vinegar. Vinegar is one of those miracle, "it does everything" products. I get a huge jug of it at Costco for $3.50? I put half a cup of vinegar in the fabric softener compartment in my washing machine and that's it. Vinegar is a natural antibacterial, removes soap scum, keeps colors bright, and naturally softens clothes. My laundry is soft and has no smell. Having no smell was something to get used to because we're trained to think that having a scent makes your laundry smell clean.
At first, I was skeptical about vinegar. I mean, who wants to smell like vinegar? But, I learned that there is absolutely no vinegar smell when it comes out of the dryer. So once I tried it, I couldn't go back. I really like that my clothes have no heavy scents/perfumes. The cherry on top is that it is affordable and not harmful to me or my family.
Monday, January 16, 2012
Rose Oil

My skin, my skin... what can I say about it? I broke out all over my forehead when I was eleven. Later, I broke out on the rest of my face. I used to spend thirty minutes in the bathroom trying to cleanse my face to prevent future breakouts. Adolescence was a bit hard, especially when the rest of my family had clear skin and couldn't understand why I had breakouts.
I remember being so envious of people who could put any type of lotion on their face - my mom, sister, brother, friends, everyone else in the world... In high school, my friend gave me a gift set from Crabtree & Evelyn. It was winter break and I couldn't wait to try it. I tried it, broke out in a deep red, itchy rash, and was miserable for the rest of the break. After getting married, I tried using a Neutrogena cleanser and experienced the same thing. After that incident my husband understood my sensitive, acne-prone, skin predicament.
A few years ago, I had a eureka moment. I realized that as soon as I feel any type of tingling on my face after applying a new product, I need to run to the bathroom and wash my face really fast. This has prevented many rashes and breakouts. I know, I know, I should have realized this sooner. Accept me for me, please. Needless to say, I am not one to try new products. I have pretty much stuck to the same skincare line.
Well, in my pursuit of a more chemical-free lifestyle, I thought that I should start using 100% natural, paraben free, phthalate free, sulfate free, petroleum free products. Doesn't everyone have these types of demands?
I was searching for products to make my own body butter (I will talk about this another time), when I came across Wild Rose Facial Oil. I wasn't sure about putting oil on my oily but turning dry skin but I was willing to try it because the price was very reasonable.
As soon as I received it in the mail, I washed my face and put the oil on my face. Here is my review:
This product is not for everyone, but if I can use it...
I remember being so envious of people who could put any type of lotion on their face - my mom, sister, brother, friends, everyone else in the world... In high school, my friend gave me a gift set from Crabtree & Evelyn. It was winter break and I couldn't wait to try it. I tried it, broke out in a deep red, itchy rash, and was miserable for the rest of the break. After getting married, I tried using a Neutrogena cleanser and experienced the same thing. After that incident my husband understood my sensitive, acne-prone, skin predicament.
A few years ago, I had a eureka moment. I realized that as soon as I feel any type of tingling on my face after applying a new product, I need to run to the bathroom and wash my face really fast. This has prevented many rashes and breakouts. I know, I know, I should have realized this sooner. Accept me for me, please. Needless to say, I am not one to try new products. I have pretty much stuck to the same skincare line.
Well, in my pursuit of a more chemical-free lifestyle, I thought that I should start using 100% natural, paraben free, phthalate free, sulfate free, petroleum free products. Doesn't everyone have these types of demands?
I was searching for products to make my own body butter (I will talk about this another time), when I came across Wild Rose Facial Oil. I wasn't sure about putting oil on my oily but turning dry skin but I was willing to try it because the price was very reasonable.
As soon as I received it in the mail, I washed my face and put the oil on my face. Here is my review:
- No rash, no breakouts, no adverse reactions.
- The smell seems strong at first but you get used to it.
- I use one drop in the morning and two at night. One drop sinks in, while two drops makes your skin feel oily because it's an oil.
- I put lotion on my face after applying the rose oil.
- After using it for 2 days my parents came over and my dad made a comment on how good my face looked.
- My husband saw a difference in my skin and started using it.
- People have commented on my husband's skin.
- I noticed that after my husband started using it, his face looked less oily.
- I notice that I have less hardened oil around my nose - women, you know what I'm talking about!
This product is not for everyone, but if I can use it...
Wednesday, January 11, 2012
Super Green Drink

After I got sick, I read different books on healthy eating for cancer patients. This is one of the things that people kept recommending: the green drink. It is a super food! It says so on the label! Read for yourself! There are many brands but this is the one that I chose. Where did I get it? Whole Foods, of course. I think that you can get it on Amazon also.
The green drink is packed with nutrients and helps to boost your immune system. It is a raw (uncooked) and organic food. It is easier to drink this than to eat a bunch of wheat grass or spinach. Drink this a few times a day, and you will achieve your daily 5-9 daily servings of vegetables. Pretty amazing.
I actually got the regular flavor (orange container). It is green. It tastes green. And, well, smells green. Someone told me that it "tastes like grass." When I first got it, I mixed it with almond milk and some agave nectar to help me get it down. It wasn't that bad. Slowly, I reduced the amount of agave and was able to drink it without any sweeteners. I actually like it now. It almost reminds me of the mate that I drank growing up in Argentina.
The only thing that bothered me about the green drink was that some clumps would form. I would make it, drink it, and get some leftover globs in my mouth. I don't like globs. Then, I went to my cousin's house. She is the wonder woman who buys organic wheat, mills it at home, and bakes her own bread. Yes, bakes her own bread. Did I mention that she has a daughter who is 6 and a set of twins who will be 3 soon? Oh yeah, she also homeschools. Don't worry, she doesn't wear jean jumpers or anything like that.
When I went to my cousin's house, she had the chocolate flavored version. I had avoided it because I thought that it might taste artificial. I don't know what I was thinking?? The whole concept behind this drink is no artificial anything. My cousin put a scoop in a glass, added a little water, stirred it, then added some chocolate almond milk.
I told her how I hated those clumps and she asked me if I added water at the beginning. I told her that I did not. That is when she told me that you are supposed to add water in the beginning so that the mixture dissolves well. She said, "It says so on the instructions." Just another Moni moment. These types of scenarios occur often in my life.
Well, let me tell you. The chocolate flavored drink was really good, especially with the chocolate almond milk. I couldn't even taste anything green. It tasted like chocolate milk! Those of you who don't like anything "green" will like the chocolate flavored mix with chocolate almond milk. (I wouldn't recommend the chocolate soy milk because of the soy. Remember, soy doesn't like me and I don't like it.) Then, I would slowly ease off of the chocolate almond milk until you can just drink it with plain, old almond or rice milk. It is possible.
Well, my cousin told my uncle that I liked the chocolate green drink and he got me two huge containers of it. I'm still finishing them up. I drink it with a little water and rice milk - no clumps! The regular and the chocolate are both good to me. Someone I know got the berry flavored one and she adds that to her shakes. Try one and see if you like it. Or buy it for your parents. It's good for them!
How to mix a green drink:
1. Pour a little water into a mug.
2. Dump one scoop into the mug.
3. Swirl the mixture (don't even need a spoon at this point).
4. Watch the powder mix into the water.
5. Add almond or rice milk (I use rice milk now - got it at Costco).
6. Mix with a spoon.
7. Drink!
Friday, December 23, 2011
Shampoo and Vinegar Anyone?
I made my own shampoo. Okay, I said it. Don't look at me funny. I made the decision to do this after reading about all the parabens, phthalates, and other chemicals in personal care products. Some might think that I'm hanging out at Whole Foods too much, maybe I am?
These are the facts of my life:
After getting sick, I started to read up on this subject. The more I read, the more aware I became of things that I had never given a second thought to. We continue to use non-stick fry pans even though the fumes from them can kill small birds. We are warned not to breathe in the fumes of gasoline or to let it come in contact with our skin, but we put it all over our bodies in the form of petroleum jelly. If you want to read something really scary, read this article about what they do to the 100% orange juice that we drink. It gets stored for over a year and has chemicals put in to "revive" the flavor! Articles like this are unbelievable! We think, "Not in America!" Okay, okay...getting off of my soap box.
I want to acknowledge that it is close to impossible to be chemical free in the United States. But I do want to simplify the products that I use. Thus, the shampoo. It was really easy to make and it does make your hair squeaky clean (literally). What about conditioner? Organic, apple cider vinegar of course! Huh? Yes, vinegar. It is supposed to restore your hair to its natural pH level.
I used it for quite a while after my surgery. I noticed that my hair was getting really clean but it was a bit drying. I didn't mind the shampoo but the apple cider vinegar took some getting used to. It actually made my hair really soft, but the smell... The smell was strong. It also kept my kids out of the bathroom when I took a shower, which was wonderful. All the moms out there know what I'm talking about! When I blow dried my hair, most of the smell would dry away. But, there was always a faint smell left over that would fade as the day passed. This made me paranoid.
After my surgery, I had to keep meeting up with each of my three surgeons and my oncologist. I wore hats to try and contain the smell (also because I had crazy hair because my husband was blow drying my hair). One time I stopped by my brother's house and had my sister-in-law smell my head. She said it was okay. Phew!
This is the conclusion that I have come to: I have to find a more conditioning shampoo recipe and a different conditioner. For now, I settled for the Whole Foods brand shampoo and conditioner. It is the 365 brand and the price is very similar to the shampoo that I buy for our family. If you have a good recipe that isn't hard on the budget, please email me. I'm still searching but when I find that great recipe, you can be sure that I will share it with all of you!
For those who are curious, here is the recipe for the shampoo:
Easy Shampoo Recipe
(adapted from Mom's Aware)
10 oz. water
1 - 2 oz. liquid castille soap
1 tspn. glycerin
Mix together and use as regular shampoo. Use up in a week or two.
You can add essential oils which are natural scents.
These are the facts of my life:
- my body has a compromised immune system.
- my body has a weak liver.
- my body doesn't need more estrogen.
- my body doesn't need extra chemicals.
After getting sick, I started to read up on this subject. The more I read, the more aware I became of things that I had never given a second thought to. We continue to use non-stick fry pans even though the fumes from them can kill small birds. We are warned not to breathe in the fumes of gasoline or to let it come in contact with our skin, but we put it all over our bodies in the form of petroleum jelly. If you want to read something really scary, read this article about what they do to the 100% orange juice that we drink. It gets stored for over a year and has chemicals put in to "revive" the flavor! Articles like this are unbelievable! We think, "Not in America!" Okay, okay...getting off of my soap box.
I want to acknowledge that it is close to impossible to be chemical free in the United States. But I do want to simplify the products that I use. Thus, the shampoo. It was really easy to make and it does make your hair squeaky clean (literally). What about conditioner? Organic, apple cider vinegar of course! Huh? Yes, vinegar. It is supposed to restore your hair to its natural pH level.
I used it for quite a while after my surgery. I noticed that my hair was getting really clean but it was a bit drying. I didn't mind the shampoo but the apple cider vinegar took some getting used to. It actually made my hair really soft, but the smell... The smell was strong. It also kept my kids out of the bathroom when I took a shower, which was wonderful. All the moms out there know what I'm talking about! When I blow dried my hair, most of the smell would dry away. But, there was always a faint smell left over that would fade as the day passed. This made me paranoid.
After my surgery, I had to keep meeting up with each of my three surgeons and my oncologist. I wore hats to try and contain the smell (also because I had crazy hair because my husband was blow drying my hair). One time I stopped by my brother's house and had my sister-in-law smell my head. She said it was okay. Phew!
This is the conclusion that I have come to: I have to find a more conditioning shampoo recipe and a different conditioner. For now, I settled for the Whole Foods brand shampoo and conditioner. It is the 365 brand and the price is very similar to the shampoo that I buy for our family. If you have a good recipe that isn't hard on the budget, please email me. I'm still searching but when I find that great recipe, you can be sure that I will share it with all of you!
For those who are curious, here is the recipe for the shampoo:
Easy Shampoo Recipe
(adapted from Mom's Aware)
10 oz. water
1 - 2 oz. liquid castille soap
1 tspn. glycerin
Mix together and use as regular shampoo. Use up in a week or two.
You can add essential oils which are natural scents.
Subscribe to:
Posts (Atom)